Intro to Sass
Class 1
Download Class 1 Files:
Welcome!
Girl Develop It is here to provide affordable and accessible programs to learn software through mentorship and hands-on instruction.
Some "rules"
- We are here for you!
- Every question is important
- Help each other
- Have fun
Welcome!
Tell us about yourself.
- Who are you?
- What do you hope to get out of the class?
- Unlimited money: where would you travel to?
Terms
-
Ruby: A server-side ("back end") language
-
Preprocessor: A computer program that modifies data to conform with the input requirements of another program. (Sass is a preprocessor)
-
Compile: The act of converting one computer program into another programming language.
-
LibSass A non-Ruby port of Sass. Allows Sass to be included in other things like Node, Docker and Harp.
-
.scss, .sass: Different syntaxes for Sass, the language. We'll use .scss here.
Tools
- Codepen: http://codepen.io/
- Create a new account or log in with Github
- "Fork" the "pens" I've set up
- Sassmeister: http://sassmeister.com/
-
Browser: Chrome or Firefox
- Development Toolkit: Chrome Inspector or Firebug for Firefox
- Command Line
- Terminal for Mac (Find in Applications> Utilities)
- Git for Windows (see how to install)
-
Text Editor:
Sass and CSS
How Sass compiles into CSS
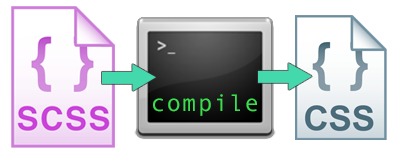
2 .You run a command (sass --watch) on the command line
3. .scss or .sass files compile into .css files
4. The browser still reads .css.
What does Sass do?
$brandColor: #f90000;
$accentColor: #fff;
header {
  background-color: $brandColor;
  color: $accentColor;
}
header a { color: $accentColor; }
What does Sass do?
header {
  background-color: $brandColor;
  color: $accentColor;
  a {
    color: $accentColor;
  }
}
What does Sass do?
%visually-hidden {
  text-indent: 100%;
  white-space: nowrap;
  overflow: hidden;
}
.image-replace {
  @extend %visually-hidden;
  background: url(logo.png) no-repeat;
}
Command Line Tips
$ cd ../$ cd /$ cd Users/marcy/Sites/gdi-sassMac / Linux:
$ ls> dirInstalling Sass
- Download for Windows: rubyinstaller.org
- Mac users: you're in luck! Mac OS X comes pre-installed with Ruby. Try the following command in Terminal to make sure:
ruby -vInstalling Sass
Now that Ruby is installed, we can install the Sass gem.
In Terminal or Git Bash:
gem install sass
Setting up our stylesheets
We need to structure our stylesheets before we can compile them.
- open the "class1-exercises" folder
- open the "practice" folder in Sublime Text
- go ahead and open index.html in a browser
Setting up our stylesheets
- rename CSS files to have a .scss file extension
- structure them inside the stylesheets folder like so:
- /stylesheets/
- /css/
- empty for now
- /scss/
- /font/
- reset.scss
- styles.scss
- /css/
- /stylesheets/
- Update your index.html stylesheet url in <head> to point to your /css/ folder.
Compile with the Sass Watch Command
Check out your index.html file in a browser. Looks funky, yes?
We need to compile our .scss (Sass) files to make the CSS work in the browser.
First, navigate via the command line to your /stylesheets directory in the "practice" folder.
Then type:
$ sass --watch scss:cssCompile with the Sass Watch Command
Let's break this command down - you're going to use it *a lot*!
$ sass --watch scss:css--watch tells Sass to look for changes to our .scss files, and to compile them to css if they have updates.
The scss bit is the folder where our .scss files live. We edit these files only.
The css part is the folder where our .css files will be. These files are the compiled output of our Sass, and are only created when we run the above command.
Nesting
Sass input:
header {
  color: black;
  nav {
    background: red;
    a { color: white; }
}
CSS output:
header { color: black; }
header nav { background: red; }
header nav a { color: white; }
Referencing Parent Selectors: &
Sass input:
nav {
    background: red;
    a {
      color: white;
      &:hover { text-decoration: underline; }
    }
}
CSS output:
nav { background: red; }
nav a { color: white; }
nav a:hover { text-decoration: underline; }
Let's Develop It!
- Open the GDI Sass - Class 1, Excersize 1 Codepen: http://codepen.io/KatieK2/pen/EaEyBw
- Rewrite some styles to use nesting and referencing the parent
- Look for selectors that share a common parent HTML element, like header, nav, footer, #main
- Look for hover styles, or add some, to practice referencing the parent with &
- There are lots of possible solutions! Be creative!
- Codepen automatically compiles the Sass and shows changes immediately.
Break Time!
Stand up and stretch - we'll resume in 5 minutes
Variables
Sometimes you want to reuse a value for a style - you use them frequently, they're hard to type or remember, such as
- Colors
#2a79af - Font stack styles
Georgia, Times, "Times New Roman", serif; - Font sizes
1.667em
Defining Variables
Variables with Sass let us reuse values more than once, while only defining them in one place
//define using dollar sign
$brandColor: #f90000;
$mainTextcolor: #fff;
$accentColor: #ccc;
To create a variable you need a dollar sign before the name of your variable, and a colon: to give it a value
Note that in Sass files, you can comment out a line with // two slashes
Variables
$brandColor: #f90000; // red
$mainTextcolor: #fff; // white
$accentColor: #ccc; // grey
header {
color: $mainTextColor;
background-color: $brandColor;
}
.content {
color: $mainTextColor;
background-color: $accentColor;
}
footer {
color: $accentColor;
background-color: $brandColor;
}Keep em together
Variables are easy to change if you keep them all in one stylesheet, and update or add to the styles as needed
// Let's define some variables
// Colors
$favoriteColor: #2a79af;
$anotherColor: #f05b62;
// Fonts
$favoriteFont: Papyrus, fantasy;
$aPracticalFont: "Trebuchet MS", "Lucida Grande", "Lucida Sans Unicode", "Lucida Sans", Tahoma, sans-serif;
// Font sizes
$aNiceBigFontSize: 16px;
$finePrint: 10px;
$giantLogo: 36px;
// Margins and Padding
$defaultMargin: 15px;
$defaultPadding: $defaultMargin;
Let's Develop It
- Create a new "pen" called utilities.scss in Codepen.
- Copy the URL this new pen.
- Paste it into CSS Configuration > External CSS in your existing pen.
- In your new stylesheet, make some new variables, and base some variables on your existing styles - look for colors, fonts, and size values.
Let's Develop It
- Create a new Sass stylesheet called _utilities.scss
- Don't forget to put it in the right folder
- Import your new stylesheet into styles.scss by putting the following code at the top of styles.scss:
@import "_utilities"; - In your new stylesheet, make some new variables, and base some variables on your existing styles - look for colors, fonts, and size values.
- Run the sass --watch command to see your changes in the browser
Syntax highlighting
You can download tools to highlight your Sass properly in Sublime Text:
- Install Package Manager for Sublime Text 2
- Go to Tools > Command Palette. Type "Package Control".
- Click "Install Package"
- Type "Sass" and click the first result
- Click: View > Syntax > Sass
Math Operations
With CSS you have to be explicit about everything, including numbers. With Sass, you can write math to calculate numbers for you:
| + | Addition |
| - | Subtraction |
| * | Multiplication |
| / | Division* |
*division is special, check the documentation link for why and how
Math Operations
Sass input:
$layoutWidth: 960px;
#sidebar {
  width: $layoutWidth/3;
}
CSS output:
#sidebar {
  width: 320px;
}
Math Operations
Sass input:
$layoutWidth: 960px;
$defaultPadding: 16px;
#main {
  padding: $defaultPadding;
  width: $layoutWidth - $defaultPadding*2;
}
CSS output:
#main {
  padding: 16px;
  width: 928px;
}
Let's Develop It
- Write a math expression in Sass to calculate the width of elements in your page layout instead of declaring a number
- Use a variable to represent the result of your calcuation
- Compile to CSS and refresh your index page to see your changes
$layoutWidth: 960px;
$navWidth: $layoutWidth/3;
footer {
  width: ($layoutWidth - 20px);
}
Color Functions
Color functions are built into Sass. They let you alter existing color values. This is the lighten function:
|
Sass input: |
CSS output: Example of output style |
Color Functions
This is the darken function:
|
Sass input: |
CSS output: Example of output style |
Color Functions
This is the grayscale function:
|
Sass input: |
CSS output: Example of output style |
Let's Develop It
- Edit your variables in Utilities "pen" file to use color functions
- Refer to the sass-lang.com docs
- Compile to CSS to see your changes
- Bonus - change the color scheme of your website without editing styles.scss!
lighten(#000, 20%)
darken(#eee, 30%)
grayscale(#2a79af)
saturate(#2a79af, 40%)
invert(#2a79af)
Comments
Traditional CSS comments are downloaded by the user. With Sass, we can specify whether comments are left in the final CSS code or are only visible to the developer:
|
Sass input: |
CSS output: |
Mixins
Mixins are really just a collection of one or more styles that are reusable, like variables are reusable values
|
Sass input: |
CSS output: Example of output style |
Mixins
These are especially useful for CSS3 rules that need browser prefixes, like gradients.
Let's Develop It
- Add some mixins to your _utilities.scss file - a good candidate is any style that needs a browser prefix
- Try replacing the footer gradient with a mixin
- Use these mixins in your styles.scss file
- Add different types of comments that describe what your mixins do, and check the final CSS in the browser inspector to see if they appear
@mixin name {
  property: value;
}
@mixin example($argument) {
  property: value;
  property: $argument;
}